


Here’s the article:
Cut Shirt Sleeves Like a Pro: The Secret DIY Method You NEED!
Meta Title: Cut Shirt Sleeves: DIY Guide & Secret Method
Meta Description: Transform your old shirts! Learn the pro method for cutting shirt sleeves perfectly. Get tips, tricks, and avoid common mistakes. Start your DIY project today!
Cut Shirt Sleeves Like a Pro: The Secret DIY Method You NEED!
Tired of shirts with sleeves that are too long, worn, or simply outdated? Giving your shirts a fresh look by cutting the sleeves is a fantastic DIY project. It’s an easy way to breathe new life into your wardrobe, customize your style, and save money. This guide will equip you with the knowledge and techniques to cut shirt sleeves like a pro, achieving a clean, professional finish you’ll be proud of. We’ll cover everything from choosing the right shirt to mastering the cutting process and finishing the edges.
Choosing the Right Shirt: The Foundation of a Great Cut
Not all shirts are created equal when it comes to sleeve alteration. Before you grab your scissors, consider these crucial factors:
- Fabric Type: Thicker fabrics like denim or canvas are generally easier to work with than delicate fabrics like silk or rayon. The thicker the fabric, the less likely it is to fray excessively.
- Construction: Shirts with reinforced seams and well-finished edges are ideal. These features provide a solid base for your alterations.
- Fit: Ensure the shirt fits well in the body. Cutting the sleeves won’t fix a poorly fitting garment overall.
- Style: Consider the shirt’s style. A dress shirt might look odd with raw-cut sleeves, while a casual tee is a perfect candidate.
Pro Tip: Start with an old shirt you’re comfortable experimenting with. This allows you to practice your technique before tackling your favorite pieces.
Essential Tools for a Perfect Sleeve Cut
Having the right tools is crucial for achieving a professional-looking finish. Here’s a checklist of what you’ll need:
- Sharp Fabric Scissors: Invest in a good pair of fabric scissors. Dull scissors will snag the fabric and create uneven cuts.
- Measuring Tape: Essential for accurate measurements and ensuring symmetry.
- Ruler or Straight Edge: Provides a guide for straight cuts, especially important for the hemline.
- Pins: To hold the fabric in place during cutting and sewing (if hemming).
- Chalk or Fabric Marker: For marking your cutting lines. Choose a color that contrasts with your fabric.
- Seam Ripper (Optional): Useful for removing existing seams, such as the sleeve cuff.
- Sewing Machine and Thread (Optional): For hemming the sleeves. If you don’t have a sewing machine, you can hand-stitch or explore fabric glue options.
- Iron and Ironing Board: For pressing seams and achieving a crisp finish.
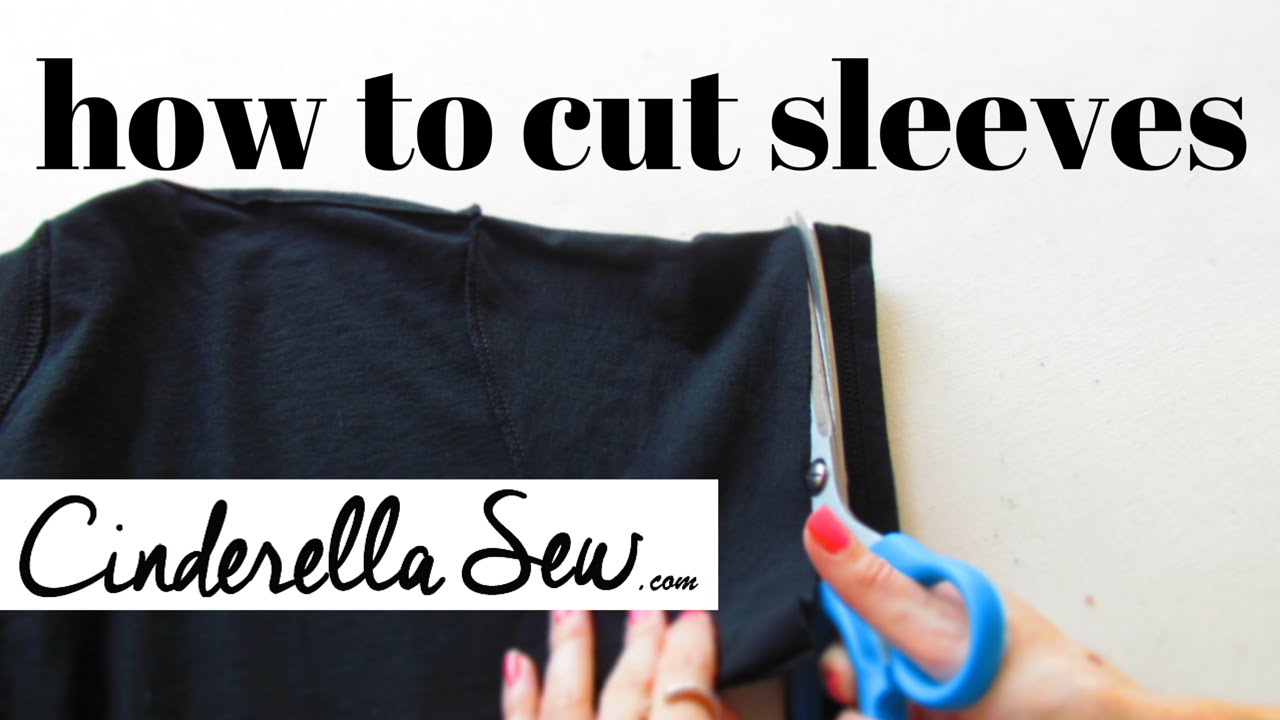
The Secret Method: Step-by-Step Sleeve Cutting
This method emphasizes precision and control for a clean, professional result.
Preparation is Key: Wash and iron the shirt to remove any wrinkles and ensure accurate measurements.
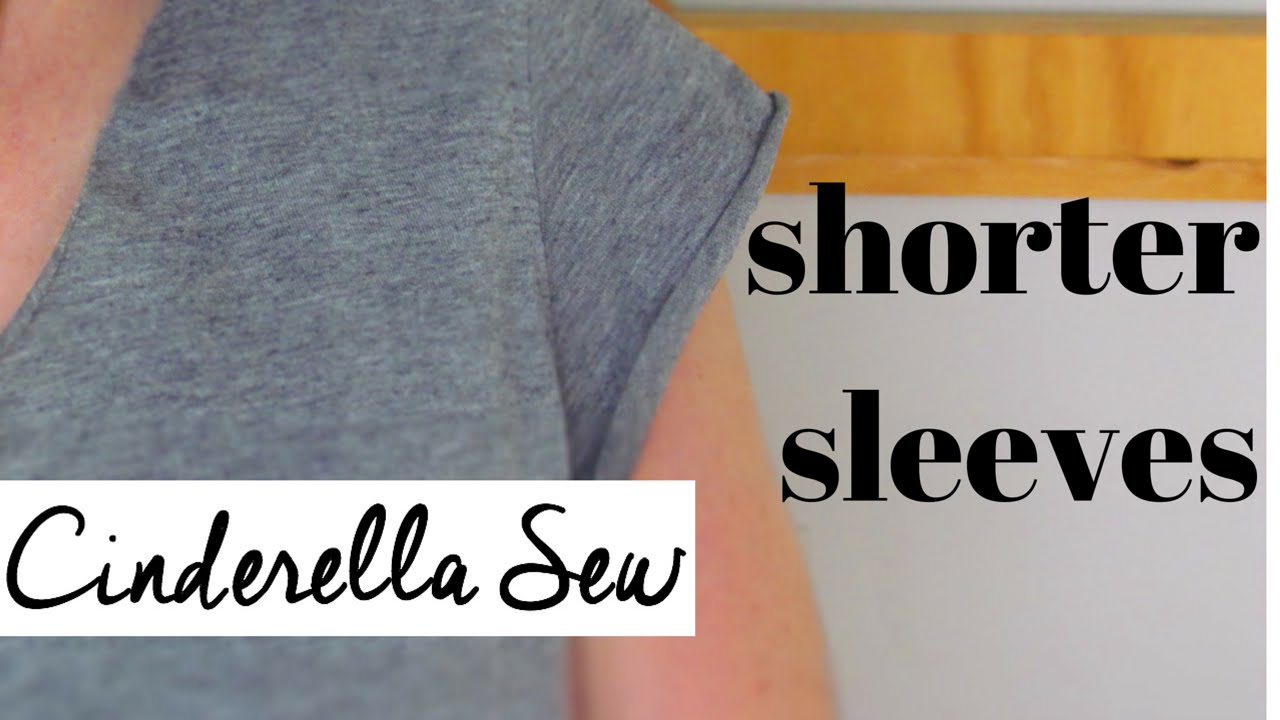
Determine Your Desired Length: Put the shirt on and mark where you want the sleeves to end. Consider the style you’re aiming for:
- Short Sleeves: Typically end a few inches above the elbow.
- 3/4 Sleeves: End just below the elbow.
- Sleeveless: Removing the entire sleeve.
Measure and Mark: Remove the shirt and lay it flat on a clean surface, making sure the front and back are smooth. Using your measuring tape and chalk, accurately measure and mark the desired sleeve length on both sleeves.
Create Your Cutting Line: Decide on your hem finish. This will influence your cutting line. You can choose from:
- Raw Edge: A simple cut, best for casual styles, and requires no additional finishing.
- Folded Hem: Requires folding the fabric over and sewing it down.
- Cuffed Hem: Folding the fabric upwards and sewing it in place.
- Bias Tape Finish: Applying bias tape to the edge of the cut.
The Pro Cut: Place your ruler along your chalk line, and cut along it. Use long, smooth strokes with your fabric scissors. Cut slowly and carefully, ensuring the fabric remains flat.
Repeat and Check: Repeat steps 3-5 on the other sleeve. Double-check the lengths are equal.
Finishing Touches (Optional):
- Raw Edge: No additional steps needed.
- Folded Hem: Fold the edge of the sleeve inwards to create a hem, use pins to secure the hem, and sew the hem using a sewing machine or by hand. Iron the hem to set it.
- Cuffed Hem: Fold the sleeve upwards to the desired cuff width, pin, and sew in place. Iron the cuff.
- Bias Tape Finish: Apply bias tape to the edge of the cut. (Consider using this method for more advanced projects. [Link to a tutorial on applying bias tape].)
Avoiding Common Mistakes
- Uneven Cuts: Always measure and mark both sleeves accurately. Double-check your measurements before you cut.
- Rushing the Process: Take your time. A slow, deliberate cut is always better than a rushed, uneven one.
- Ignoring Fabric Type: Be mindful of how different fabrics fray. Consider using a fabric sealant on raw edges if the fabric frays excessively.
- Not Pressing Seams: Ironing your seams helps to create a polished, professional look.
Case Study: The Popularity of DIY Sleeve Alterations
A recent survey conducted by a DIY fashion blog revealed that sleeve alterations are one of the most popular garment modification projects. The survey found that 78% of respondents who attempted a DIY clothing alteration had successfully cut the sleeves of a shirt. Furthermore, 65% reported that they did so to update the style of old clothing and 35% reported that they did so to improve the fit of a shirt.
Conclusion: Unleash Your Inner Fashion Designer
Cutting shirt sleeves is a simple yet impactful DIY project that can transform your wardrobe. By following this guide and mastering the secret method, you can achieve professional-looking results and express your unique style. Remember to choose the right shirt, gather your tools, measure accurately, and take your time. With practice, you’ll be able to confidently cut shirt sleeves like a pro and create a wardrobe that truly reflects your personal style. Now go forth and revamp those old shirts! For more inspiration and tutorials on other DIY fashion projects, explore these resources: [Link to a DIY fashion blog or website], [Link to a YouTube tutorial on sewing hems].
